Pages

Tuesday, August 17, 2010

A potential change in direction?


After several long discussions, we decided we wanted the space man to be able to grow things. Plant mushrooms, bring long dead flowers back to life, etc.

As we only have skeletal animation working in the engine, I had a bit of a play at animating a growing tree skeletally.
This is only a test, it likely will look a whole lot better in game, but the point is that it worked.

Tuesday, June 8, 2010

Stage 4 - Concept Art


This is a stage I felt was important as to clarify and sum up the groups characterization of the Spaceman, we wanted to convey his identity in a strong way to our audience. I wanted to communicate and underline some key features here. Design, Characterization, Humor and interaction. It was also a way for me to present to the group my ideas for the textures of the Spaceman's suit.

Stage 3 - Weapon Design


I spent a long time trying to really push this design.I felt that perhaps a simple door composed of a simple slab of metal would be boring to look at for hours on end. I also didn't want it to dominate the viewers viewpoint whilst steering the avatar. Obviously the bottom design here is a prime example of something I wanted to avoid, it was my first concept. The top 2 designs where best examples of my finished design. I spent a lot of time trying to figure out how this weapon would interact with the avatar in animation. I set requirements for myself being:

1. It should be fairly compact as not to hinder viewer line of sight
2. Its width needs to be narrow enough that when the character runs, his elbows do not collide or conflict with the weapon.
3. It should be large enough to look like it could squish bugs with.
4. Large enough to give the character a sufficient attack radius.
5. Incorporate some way for this item to be used as a platform

Obviously I worked out fairly early that some of these design requirements conflicted with one another. Therefore I experimented with the idea of the bulkhead being able to animate. This way I could make sure that it would fit all these requirements.

My ideal finished design would have had the spaceman turn the handle of the bulkhead to expand the panels. This would make it larger in order to give him a larger attack radius and a bigger platform.

Stage 2 - Character Conception 3


I set to work on the 3rd round of character design, I really tried to stay true to the idea of an 'ipod' . I wanted to give this character some sort of identity so I experimented for sometime with different logos on the spaceman's suit, I thought that this would help characterize him as roguish imp with a very easily identifiable persona. The logo idea was since dropped. However I feel its something that I may try to introduce in the future, arm patches etc, I think this might give him a sort of untold back story.

Stage 2 - Character Conception 2


I spent quite a lot of time on different designs, experimenting with different designs for this character. 'Blue Fuzzy', as I refure to him, was a design I was really happy with however this did not meet the groups criteria. At the time I was also working on slides for the Design document, when my 'Blue Fuzzy' design was rejected, Scott picked out the simple silhouette from the document and referred me back to that. The design he envisioned was far simpler. The group would use words like 'ipod' and 'mac' in referral to the spaceman's design.

Stage 2 - Character Conception


When it came to the character design my initial concept started with a man in a suit with no predetermined features to give the group an idea of the proportions. The group was happy with this, so I wanted to push this design further . my thoughts where for a character a little like 'Rachet' from 'Rachet and Clank'. I wanted to create something that the player could instantly recognize as 'cute but mischievous' with almost a slightly menacing aura.

Stage 1 - Identity creation


To give our games group a degree of professionalism we decided to create a logo. I wanted this logo to reflect our groups fun and quirky mannerisms, I breifly covered a few options for the logo. Exploring with different images in the logos creation also set the way for our art direction in some ways. The cartoon like stylization carried though to the game itself.

Monday, June 7, 2010

Another bug!

Just doing some texturing in the break to keep my brain afloat; not 100% happy with this and will probably tweak it later on. His middle is all sorts of vague in my head.


I like his bum though, hehe.


Wednesday, May 26, 2010

Character Development: Part 04

As the main character had to be extensively animated, a comprehensive rig was required.


Animations produced for the character include; a walk cycle, idle cycle, jump, arm weapon, disarm weapon, and attack. The rig was updated to include an additional bone coming from the left wrist and a controller that manipulated the translations and rotations of this bone. Joints were added to the weapon in positions that could be anchored to the spaceman's wrist bone or backbone depending on weather the weapon was drawn.

Character Development: Part 03

Our characters primary mode of attack is using a makeshift weapon, specifically the very hatch that falls from his ship as it crashes.

High polygon versions of both the spaceman and bulkhead weapon meshes were created. From these, ambient occlusion maps were baked and used in texture creation.


Character Development: Part 02

To get a feel for the character he was initially blocked out in Maya using basic primitives. From this reference the initial model was created.


The character mesh was continually refined over many progressive iterations.

Character Development: Part 01

In beginning the design process for our protagonist/player character we decided he should be humanoid enough for players to identify with him yet distinctly nonhuman in fitting with an aesthetic that avoided realism. Initial designs had him more bestial and perhaps even less human like.


We decided to move away from this look in favor of covering his face with a helmet. This gives the character an air of mystery and allows players to come to their own preconceptions as to the protagonists real facial appearance.


In further developing the character we experimented with different body proportions until finally taking inspiration in part from the proportions of a gorilla or similar primate.

Sunday, May 23, 2010

Last bits of texturing

Finished up the texturing load for the prototype! Pretty pictures of things follow:
Super proud of the bug texture; he has an ambient glow and nice transparency on the wings.

... and he's super cute.


The tree is done, though I'm not 100% happy with it. Still, modelling isn't my strong suit, so I think I did pretty well.

View from the tree of the ship...

... and back the other way! The ship is pretty basic at this point, but it matches up with the bulkhead and spaceman.

Now all I have to do is finish up the Design Document for Thursday and we're set. Maybe. Fingers crossed!

- Holly

Saturday, May 22, 2010

And then there was gravity, and it was good.

Our current build has the unfortunate tendency to let you go walking off into space and giving your the luxury of a choice when confronted with the plot fork called 'Cosmic Roots has encountered an error and must close'. This choice is 'End Process' or well... nothing else... This is non-linear gameplay at its finest.

To rectify this, I needed to finish adding all the gravity splines. Apparently my temporary ones weren't sufficient (and I would hope not, given how ugly they looked).

So, we now have proper gravity curves. Look at them, they are so curvy...


Now John gets to run his magic code all over them to allow us to maneuver properly through our mushroom filled stage!

WHY DO BUGS HAVE SO MANY LEGS!

Well, I just finished one of the most complex walk cycles I have ever contemplated. It only took me three attempts too...

Here is the lovely rig...

Now, there are in fact doubles of each leg there. That is because they are multi-jointed and a simple RP solver doesn't work. Instead, each leg has both an ikSpring solver and ikSpline solver applied to them, causing them to bend correctly. It does however limit them to smaller movements and doesn't allow for more extreme motions, as a normal knee rig would. It is still ok for walking motion though.

The actual walk cycle was easy once I realised that I should treat two sets of three legs as I would normally treat each individual leg for a biped. After I set up two opposing cycles for each of the three legs it was simply a matter of moving them laterally so that they didn't interfere with each other. Easy!


Tuesday, May 18, 2010

Coding - Stage 5

Stage 5:
- Optimise gravity searching
- Optimise terrain searching
- Gravity smoothing

Gravity searching and terrain searching were done similarly. Firstly, gravity was no longer a single polygon, but now a complex mesh. I created a simple process to create the mesh in Maya using an EP curve, then duplicating the curve and moving the duplicate a small amount (0.1 in the + y axis), then lofting the 2 curves to create a NURBS surface, then tesselating the surface to create a polygon mesh. This was all because Maya and FBX do not support vertex lines.

Gravity searching and terrain searching optimisation required a specialised Model processor. I coded the processor to search through all the gravity vertices and add them to the AllGravity list, unless there is a vertex exactly 0.1 units above it. This removed all extra vertices created by the gravity creation process. The next stage was to go through each gravity point and find all the points that are connected to it. The process that the game engine used to find gravity was now different. Initially it searches through all gravity to find the nearest one, then only search the ones that are connected to the current gravity point. This reduced the time the CPU spends searching for gravity by a factor proportional to the number of gravity points (more than 1,000 times!).

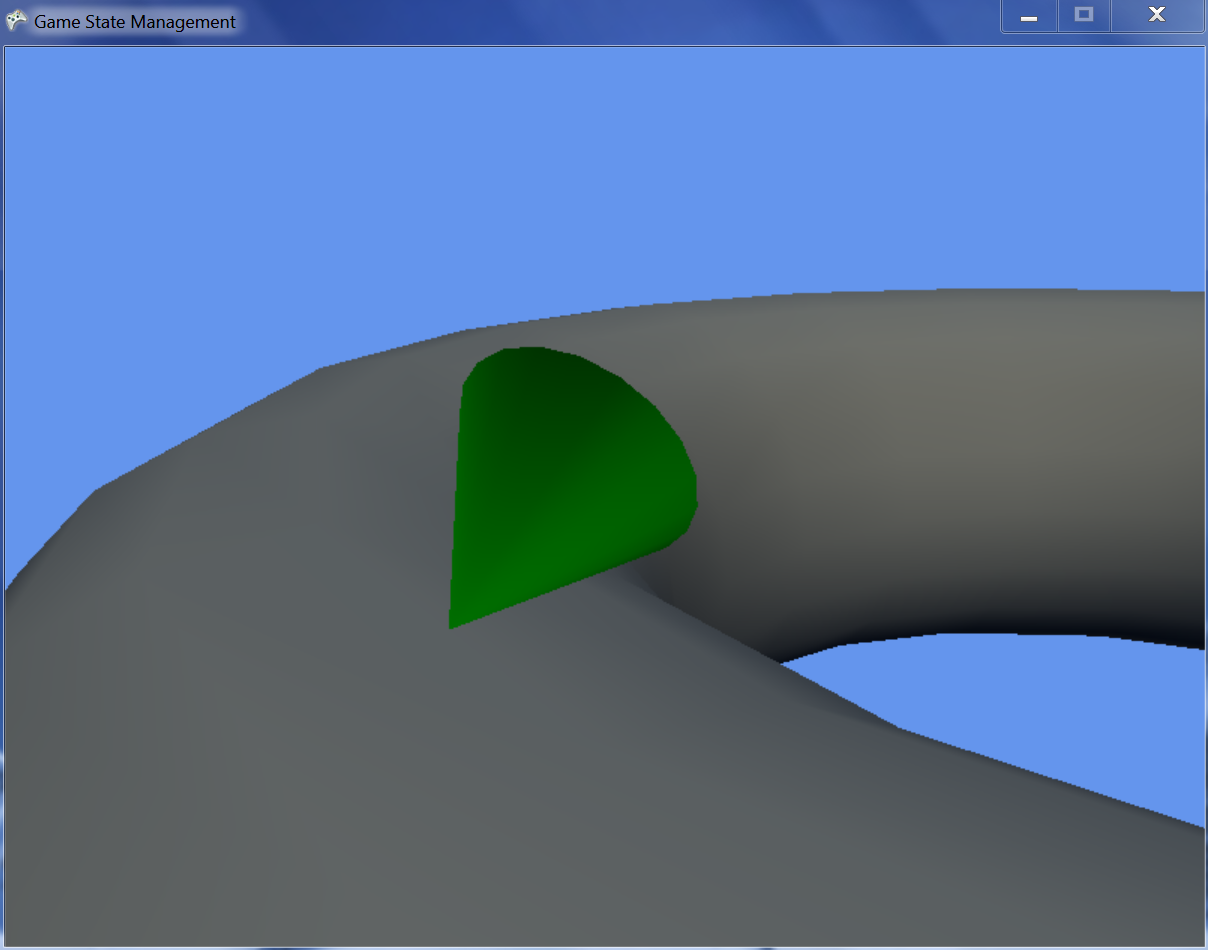
The terrain searching was very similar. Add each terrain triangle to the list of AllTerrain, then for each triangle, search through all other triangles and add them to the surrounding triangle list if they share a vertex. The game engine then initially searches all terrain to find the initial terrain triangle the character is on, then only search the surrounding terrain. This reduced the time the CPU spends searching for terrain by a factor proportional to the number on terrain triangles (more than 10,000 times!!!). This also meant that build time took about 200 times longer.

Gravity smoothing was done by modifying the point which is used for gravity. The engine knows which gravity point is the closest, then searches for the next closest gravity point to the character and finds the intermediate point that is closest to the character. This smooths walking greatly and also reduces the number of gravity points needed in the level and implements true gravity spline functionality. A jitter still occurs when gravity shifts to a point that wasn't connected to the previous gravity point. This occurs around spirally surfaces and can be fixed by allowing the engine to search past the connecting gravity points at a cost of CPU time.

Coding - Stage 4


Stage 4:
- Character controls

Character controls are implemented with WASD or an xbox gaming controller. When a character moves, the forward and right move vectors are calculated based on the current terrain the character is standing on and the position of the camera. The character model was also rotated to face the direction of travel. This was a complex procedure. Calculating which terrain the player is standing on was initially calculated using the Triangle Picking sample found on the XNA creators club website. The method in the sample looped through every triangle in the level model to find which triangle intersected the player's down vector. This was highly inefficient and had to be modified in a later stage.

Gravity was also implemented in a similar method; search through all gravity points to find the nearest and use that as gravity. This caused 2 issues. The first issue was that when a level got larger and if there were a few characters in the level, the CPU would be overloaded with calculating which terrain and gravity to use. The second issue was that the character would snap to the nearest gravity point, causing lots of jittery movements. These issues would be resolved in a later stage.

Using an analog controller like the xbox controller thumbsticks created a very smooth movement.


Coding - Stage 1, 2, 3

The first stage of creating the engine included:
- Loading the level
- Adding spectator style controls

The level loading was done using the XNA built in Model importer and processor. The spectator controls were simple WASD controls at first.

Stage 2 included:
- Using a joint to specify the start position of the player
- Loading the player model
- Adding third person camera control with the mouse

This was fairly straight forward. The start joint was easily accessed using the Model class. The player model was loaded similarly to the level. The third person camera control was implemented so that the player can rotate the camera around the player as well as incline / decline the pitch of the camera.


Stage 3:
- Implementing animations
- Using gravity splines

Implementing animations was done using the Skinned Model Example found on the XNA creators club website. Multiple animations were a problem however. This was because the Autodesk FBX plugin used by Maya did not handle output of multiple "Takes". This was overcome by exporting each animation as ASCII FBX files and then manually merging all animations into a single file. This allowed custom naming of animations but was time consuming. Hopefully this issue gets resolved within the Maya FBX exporter.

Gravity splines at this stage were a single polygon. Gravity was found by cycling through each vertex and finding the nearest one, and then using the vector pointing from the gravity point to the character position as up. Problems arose in the camera causing it to flip out when up was no longer in the +y axis. The view matrix had to be recalculated every frame to ensure it was always rotated in the same orientation as the player.


The Root System


Howdy, Holly here with shiny gems of goodness!

It's been my job in development to work on the root system level; a winding, spinning and only slightly disorientating place that is home to giant mushrooms, bugs and the hub of the action in our game.


As you can sort of see from the renders, I've not only modelled the majority of the level (let's call it a good play testing portion!) but I've textured it and the statics by Callan. Sadly, our roots themselves need to be re UV'd, so any strange texture clipping will have to be creatively ignored for the time being.

The most challenging thing I've found has been combating motion sickness from spinning around and upside down with mushrooms in an attempt to make the level make sense from every angle. I am however incredibly proud of my root texture, which really ties the environment together imo!


Apart from the texturing, I've also been building the Tree for the root system, as well as organising our presentation next week and our Design Document. In the next week I'm going to finish 'decorating' the level with mushrooms, add some grass planes that I've already textured up, texture the tree and add it to the level.

With any luck, all will go smoothly! (heh)